KNE: Kneading role in cake making Explained
When it comes to baking, the technique of kneading often feels like it belongs to bread making rather than cakes. However, kneading has its place in the world of cakes too. In this topic, I’m going to talk about kneading, its significance in cake making, and share some insights from my own personal experience.
Table of Contents
ToggleWhat is Kneading?
Kneading is a process that involves working dough or batter with your hands or a mixer to develop its texture. For bread, this process is crucial as it helps to develop gluten, which gives bread its chewy texture. But what about cakes? Cakes don’t usually require the same kind of kneading that bread does, but understanding the concept can help in various baking situations.== >> Check out the right cake Kneading tools and ingredients that you need here
Kneading in Cake Making: What’s the Deal?
When making cakes, kneading isn’t typically necessary. Most cakes are made using the creaming method, where butter and sugar are beaten together until light and fluffy, or the rubbing-in method, where fat is rubbed into flour to create a crumbly texture. These methods don’t involve kneading, but they’re key to achieving the right texture in cake batter.== >> Check out the right cake Kneading tools and ingredients that you need here
However, there are a few scenarios in cake making where kneading comes into play:
- Marzipan and Fondant: Kneading is essential for working with marzipan and fondant, which are often used to cover cakes or create decorations. Kneading these ingredients helps to make them pliable and easy to work with, ensuring they can be rolled out smoothly and adhere well to the cake surface.
- Cake Batters with a High Fat Content: Some cake recipes, especially those with high-fat content, might benefit from a gentle knead to ensure even distribution of ingredients. This is less about developing gluten and more about achieving a uniform consistency.
- Gum Paste and Modeling Paste: Similar to fondant, gum paste and modeling paste require kneading to become smooth and workable. This allows for creating intricate decorations and shapes that hold their form once dried.== >> Check out the right cake Kneading tools and ingredients that you need here
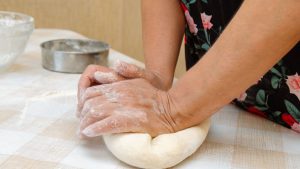
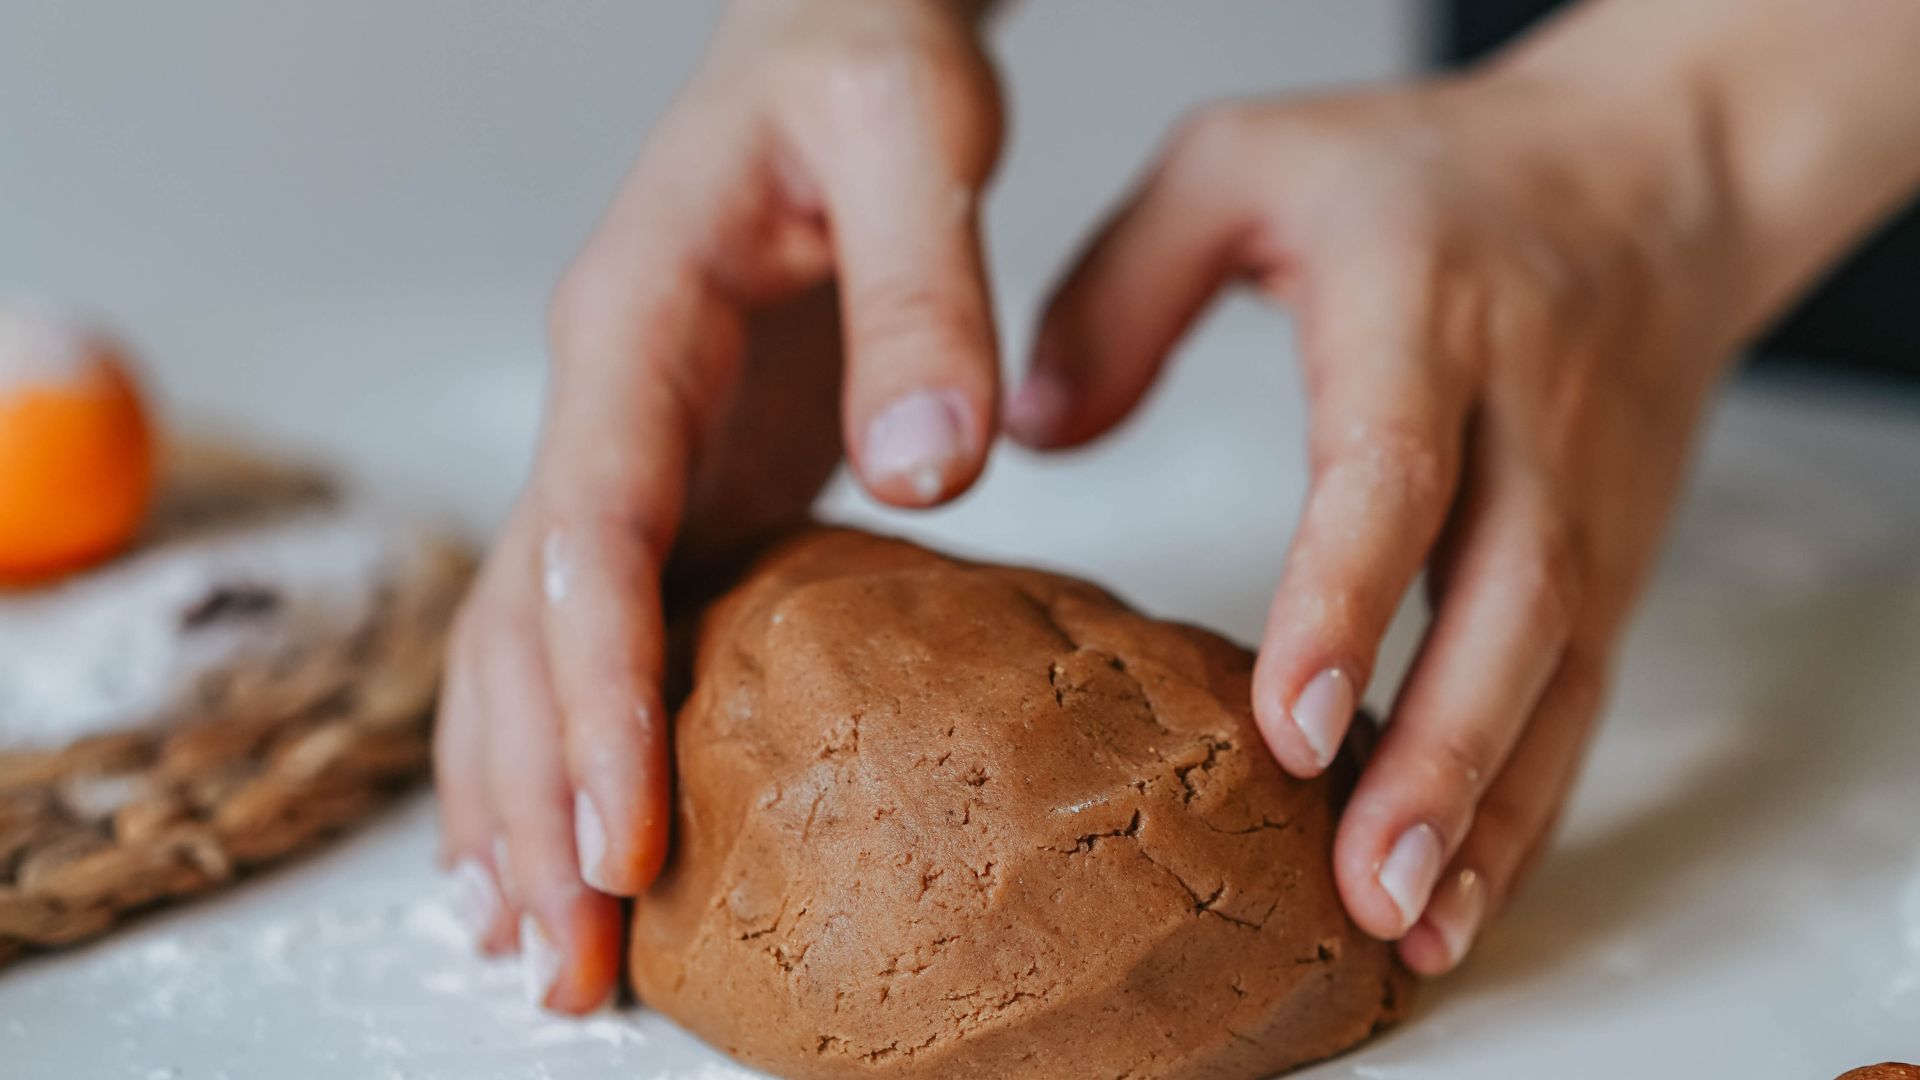
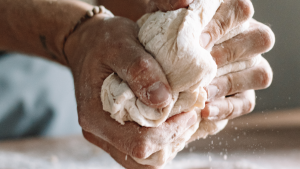
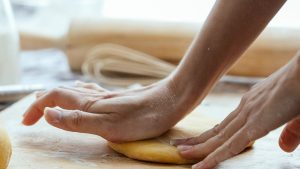
Photo of a Person Kneading Dough
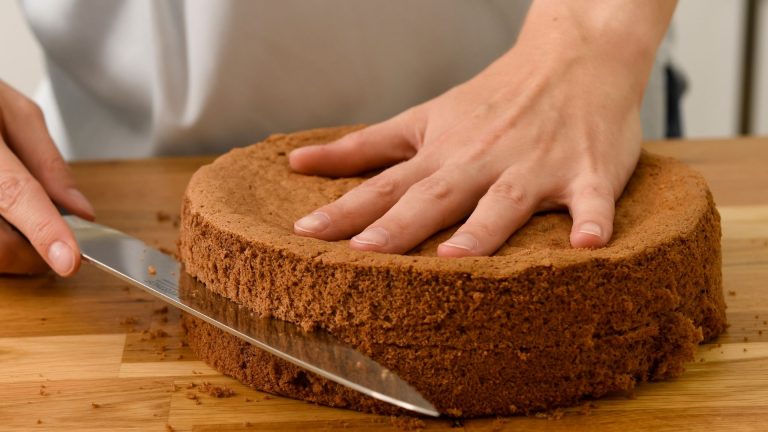
The Impact of Kneading on Cake Texture
While traditional cake recipes don’t require kneading, understanding the role of kneading can be useful. Over-kneading cake batter can lead to a dense texture, as it can cause the formation of too much gluten. This is why gentle mixing or folding is usually recommended for cake batters to keep them light and airy.
== >> Check out the right cake Kneading tools and ingredients that you need here
Kneading vs. Mixing: Understanding the Differences
When it comes to baking, kneading and mixing are two fundamental techniques that play crucial roles in achieving the perfect texture and consistency of your baked goods. Understanding the differences between them can help you master the art of baking. Here’s a breakdown of each process and how they differ.
Mixing
Mixing is the process of combining ingredients together to form a uniform mixture. In baking, mixing is used to blend various components like flour, sugar, eggs, and butter. The goal of mixing is to ensure that all ingredients are evenly distributed and that the batter or dough reaches the desired consistency.
Types of Mixing:
Creaming: Beating butter and sugar together until light and fluffy, often used in cake recipes.
Folding: Gently incorporating ingredients to maintain airiness, commonly used in recipes involving whipped cream or beaten egg whites.== >> Check out the right cake Kneading tools and ingredients that you need here
Stirring: Combining ingredients in a bowl, typically used for batters and doughs that don’t require much air.
Key Points:
Purpose: To combine ingredients and achieve a uniform mixture.
Equipment: Can be done with a whisk, spoon, or electric mixer.
Texture Impact: Affects the final texture by integrating ingredients but does not develop gluten significantly.
Kneading
Kneading involves working dough with your hands or a mixer to develop its structure. This technique is crucial for bread making, where it helps to develop gluten, which gives bread its chewy texture. In contrast to mixing, kneading is more about the physical manipulation of dough.
Types of Kneading:
Traditional Kneading: Pressing, folding, and stretching dough by hand.
Machine Kneading: Using a stand mixer with a dough hook to knead dough.
Key Points:
Purpose: To develop gluten in dough, improving its elasticity and texture.
Equipment: Typically done by hand or with a stand mixer.
Texture Impact: Influences the final texture of bread and other baked goods by creating a chewy structure.
Key Differences Between Kneading and Mixing
Purpose and Process:
Mixing: Aims to combine ingredients evenly without significantly altering their structure. It’s about creating a homogeneous mixture.
Kneading: Focuses on developing the gluten network in dough, which impacts the elasticity and texture of bread and other dough-based products.
Texture Impact:
Mixing: Affects the texture by blending ingredients but does not significantly affect the gluten network.
Kneading: Directly impacts the texture by strengthening the gluten, making the dough more elastic and chewy.== >> Check out the right cake Kneading tools and ingredients that you need here
Application:
Mixing: Used in a variety of baking processes, including cakes, cookies, and muffins.
Kneading: Primarily used in bread making and other doughs where gluten development is essential.
Techniques:
Mixing: Can be done gently to avoid overworking the batter.
Kneading: Requires more physical effort and is often done for a specific amount of time to ensure proper gluten development.
When to Use Each Technique
Mixing: Ideal for batters and doughs where you want a uniform blend of ingredients without over-developing gluten. Use this technique for cakes, cookies, and muffins.
Kneading: Essential for bread and pizza doughs where you need a strong gluten network to achieve the desired texture. Use this technique for making artisan breads and pizza crusts.
Kneading Tips for Beginners
Kneading is a crucial skill in baking, especially when working with bread dough. If you’re new to baking and find yourself daunted by the idea of kneading, don’t worry these tips will help you get started and master this essential technique.
1. Know When to Knead
Not all doughs require kneading. Before you start, make sure that the recipe calls for kneading. For instance, bread and pizza doughs typically need kneading, while cake batters and cookies usually do not.
2. Start with a Clean Surface
Kneading works best on a clean, flat surface. Use a countertop or a large cutting board. Lightly flour the surface to prevent sticking, but be careful not to use too much flour as it can dry out your dough.
3. Use the Right Technique
For most bread doughs, use the “push, fold, and turn” technique:
- Push: Use the heel of your hand to push the dough away from you.
- Fold: Fold the dough back towards you.
- Turn: Rotate the dough a quarter turn and repeat the process.
4. Don’t Overwork the Dough
Over-kneading can lead to a dense, chewy texture. Knead the dough until it becomes smooth and elastic. This usually takes about 8-10 minutes of kneading by hand. If you’re using a stand mixer, the dough should be kneaded for about 5-7 minutes on medium speed.
5. Check for the “Windowpane Test”
To check if your dough is properly kneaded, perform the windowpane test:
- Take a small piece of dough and stretch it between your fingers.
- If it stretches thin enough to see light through without tearing, the dough is ready. If it tears easily, keep kneading.== >> Check out the right cake Kneading tools and ingredients that you need here
6. Adjust Flour and Liquid as Needed
If your dough is too sticky, sprinkle a little flour onto the surface and your hands. If it’s too dry, add a small amount of water, a teaspoon at a time. The goal is to achieve a smooth, elastic texture.
7. Rest the Dough
After kneading, let your dough rest. This allows the gluten to relax and makes the dough easier to work with. Place it in a lightly greased bowl, cover with a damp cloth, and let it rise in a warm place until it has doubled in size.
8. Practice Patience
Kneading is both an art and a science. Don’t rush the process. Take your time to develop the dough properly. As you practice, you’ll get a better feel for how the dough should look and feel.
9. Use a Dough Scraper
A dough scraper can be a helpful tool to manage sticky dough. It helps to lift and turn the dough, keeping it from sticking to the surface and your hands.
10. Consider Using a Stand Mixer
If kneading by hand isn’t your thing, a stand mixer with a dough hook can do the job for you. Just be sure to follow the manufacturer’s instructions for kneading times and speeds.
== >> Check out the right cake Kneading tools and ingredients that you need here
Kneading vs. Folding: What’s the Difference?
In baking, kneading and folding are two essential techniques that impact the texture and structure of your baked goods. Understanding the difference between them can help you achieve the perfect consistency in your recipes. Here’s a detailed comparison to clarify how and when to use each technique.
What is Kneading?
Kneading is the process of working dough to develop its texture and strength. This technique is most commonly associated with bread making, where it helps to develop gluten, giving the bread its structure and chewiness.
How to Knead:
Flatten and Stretch: Press the dough down and away from you with the heel of your hand.
Fold and Turn: Fold the dough over itself and rotate it a quarter turn.
Repeat: Continue the process for about 8-10 minutes, or until the dough becomes smooth and elastic.
Purpose:
Develops Gluten: Helps to build the gluten network in bread dough, making it elastic and able to rise properly.
Improves Texture: Creates a smooth, cohesive dough that can trap air and rise effectively.
When to Use:
Bread Dough: Essential for yeast-leavened breads, pizza dough, and other recipes requiring a strong gluten structure.
Certain Pastries: Used in some pastry recipes to ensure the dough is properly mixed.
What is Folding?
Folding is a gentler technique used to incorporate ingredients or incorporate air into a batter without deflating it. This method is often used in recipes where maintaining a light, airy texture is crucial.== >> Check out the right cake Kneading tools and ingredients that you need here
How to Fold:
Add Ingredients: Gently add the additional ingredients (like beaten egg whites or whipped cream) to the mixture.
Use a Spatula: With a spatula, cut through the center of the mixture, then lift and fold it over the top.
Turn and Repeat: Rotate the bowl slightly and repeat the folding process until the ingredients are combined. Do this gently to avoid deflating the batter.
Purpose:
Incorporates Air: Helps to keep the batter light and airy by maintaining the air bubbles already incorporated.
Mixes Gently: Ensures ingredients are combined without overworking or deflating the batter.
When to Use:
Cake Batters: Often used in recipes that involve whipped egg whites or cream, like soufflés and angel food cakes.
Meringues and Mousses: Essential for maintaining the light texture of these delicate desserts.
Key Differences Between Kneading and Folding
Purpose and Process:
Kneading: Focuses on developing gluten in dough by working it until smooth and elastic. It involves more physical manipulation and is typically used in bread and pizza doughs.
Folding: Aims to gently incorporate ingredients without losing air or deflating the batter. It’s used to mix delicate batters and maintain their lightness.
Texture Impact:
Kneading: Creates a firm, elastic dough that can rise well and has a chewy texture. Over-kneading can make dough tough.
Folding: Keeps the batter airy and light, crucial for recipes where texture is key. Over-folding can result in a dense final product.
Application:
Kneading: Applied to doughs where a strong gluten network is required, such as for bread and pizza.
Folding: Used in recipes that require a delicate texture, such as cakes and mousses.
Technique:
Kneading: Involves pressing, folding, and turning the dough with your hands or a mixer.
Folding: Involves gently lifting and folding ingredients with a spatula to combine without deflating.
Practical Tips
For Kneading: Ensure your dough is properly hydrated and use the “windowpane test” to check if it’s ready.
For Folding: Use a large spatula and be gentle to preserve the texture of your batter.== >> Check out the right cake Kneading tools and ingredients that you need here
Kneading vs. Folding: Comparison Table
| Aspect | Kneading | Folding |
|---|---|---|
| Purpose | Develops gluten in dough; creates elasticity | Incorporates ingredients gently; maintains air |
| Process | Press, stretch, fold, and turn dough | Lift and fold ingredients gently with a spatula |
| Texture Impact | Creates a smooth, elastic dough; chewy texture | Keeps batter light and airy; delicate texture |
| Common Uses | Bread, pizza dough, certain pastries | Cake batters, soufflés, meringues, mousses |
| Technique | More physical; involves working the dough thoroughly | Gentle; involves minimal mixing |
| Equipment | Hands, stand mixer with dough hook | Spatula, large bowl |
| Check for Readiness | Windowpane test (stretch dough thin without tearing) | Visual and tactile; mixture should be uniform |
| Risk of Overdoing | Over-kneading can make dough dense and tough | Over-folding can deflate batter, making it dense |
Key Notes and Considerations
Kneading
- Development of Gluten: Essential for creating the structure in bread and pizza dough. Proper kneading helps the dough rise and achieve a desirable texture.
- Texture and Consistency: Achieves a smooth and elastic dough. If under-kneaded, dough may be too sticky and not rise properly. Over-kneading can lead to a tough texture.
- Physical Effort: Requires more effort and time compared to folding. Use your hands or a stand mixer to work the dough thoroughly.
- Typical Time: Kneading by hand usually takes about 8-10 minutes. In a stand mixer, it’s around 5-7 minutes.
Folding
- Incorporation of Air: Ideal for recipes where maintaining a light, airy texture is crucial. Preserves the air bubbles already incorporated into the batter.
- Delicate Process: Gentle technique to avoid deflating the batter. Important for achieving the right texture in cakes and other light pastries.
- Visual and Tactile Checks: The batter should be uniformly mixed without losing its lightness. Avoid over-mixing to prevent a dense final product.
- Ease of Use: Less physically demanding compared to kneading. Use a spatula and a large bowl to fold ingredients gently.
Understanding the distinctions between kneading and folding helps in applying the right technique for the desired outcome in your baking projects. By recognizing the specific needs of your recipe, you can ensure that each step contributes to a successful final product.== >> Check out the right cake Kneading tools and ingredients that you need here
FAQs on Kneading vs. Folding
1. What’s the main difference between kneading and folding?
Kneading involves working dough to develop gluten, which gives bread its structure and elasticity. It requires physical effort to press, stretch, and turn the dough. Folding, on the other hand, is a gentle technique used to incorporate ingredients without deflating the batter, maintaining its light, airy texture.
2. When should I use kneading in baking?
Kneading is used primarily in bread making and recipes requiring a strong gluten network. It’s essential for yeast-leavened doughs, such as bread, pizza dough, and certain pastries, where a chewy and elastic texture is desired.
3. When is folding the appropriate technique?
Folding is ideal for batters and mixtures where you want to preserve air and maintain a light texture. It’s commonly used in recipes involving whipped egg whites or cream, like soufflés, meringues, and delicate cakes.
4. Can I over-knead dough?
Yes, over-kneading can make dough tough and dense. It’s important to knead just until the dough becomes smooth and elastic. For bread, use the windowpane test to ensure proper gluten development without overworking the dough.
5. What happens if I over-fold a batter?
Over-folding can deflate the batter, resulting in a denser texture. It’s important to fold gently and only until the ingredients are fully combined, preserving the batter’s airiness.
6. How do I know if my dough is properly kneaded?
The dough is properly kneaded when it is smooth, elastic, and passes the windowpane test—meaning it can stretch thin without tearing. It should also be soft and slightly tacky but not sticky.
7. Is folding used in bread making?
Folding is generally not used in traditional bread making where kneading is required. However, it can be used in specific bread recipes like those involving high hydration or adding ingredients like fruit or nuts.
8. Can I knead dough with a stand mixer?
Yes, a stand mixer with a dough hook is an excellent tool for kneading dough. It’s less physically demanding and can knead dough more evenly and efficiently. Follow the manufacturer’s guidelines for time and speed.
Final Words
Mastering the techniques of kneading and folding is essential for successful baking. Kneading develops the gluten network necessary for a chewy, well-structured dough, making it a crucial step in bread making and certain pastries. Folding, on the other hand, is a delicate process that preserves air and lightness in batters, ideal for cakes and airy confections.
Understanding when and how to use each technique will enhance your baking skills and ensure that your recipes turn out as intended. With practice, you’ll gain confidence and precision in applying these techniques, leading to delicious and perfectly textured baked goods.

Hi!
I’m Mike, the creator of Forum Foodies. In my own personal experience, understanding ingredients is key to great cooking.
Forum Foodies offers guides on various ingredients, from staples to exotic finds. Join our community, share your experiences, and learn from fellow food lovers.
Have questions or suggestions? Email me at info@forumfoodies.com. Let’s embark on this delicious adventure together.
Happy cooking.
Mike/
Related Posts
- SCO: Scooping role in cake making Explained
In the world of cake making, every little detail matters. One technique that might seem…
- SLC - Slicing role in cake making Explained
When it comes to baking, the art of slicing can make or break the final…
- BRU: Bruising Role in Cake Making Explained
When it comes to baking, it’s easy to get caught up in the complexities of…
- CUT - Cutting role in cake making Explained
In this topic, I’m going to talk about the often-overlooked but crucial aspect of cake…
- TMP: Tempering Role in Cake Making Explained
In this topic, I’m going to talk about tempering, a technique that’s often overlooked but…
- BSH: Basting role in cake making Explained
In this topic, I'll talk about BSH basting and its role in cake making, sharing…
- FZ: Freezing role in cake making Explained
In this topic, I’m going to talk about the role of freezing in cake making,…
- FRY: Frying Role in Cake Making Explained
In this topic, I'm going to talk about a fascinating technique in cake making: frying.…
- GRD: Grating role in cake making Explained
When it comes to cake making, it's often the little details that make a big…
- DST: Dusting role in cake making Explained
In this topic, I’m going to talk about dusting and its crucial role in cake…
- SPN: Spoon role in cake making Explained
Hey there, cake lovers. In this topic, I'm going to talk about the humble spoon…
- PST: Pastry Role in Cake Making Explained
When it comes to baking, pastries are often thought of as their own special category,…
- SCR - Scoring Role in Cake Making Explained
When it comes to cake making, every detail matters, from the ingredients you use to…
- PSG - Pasting role in cake making Explained
In this topic, I’m going to talk about PSG (Pasting) and its crucial role in…
- BRT - Brushing role in cake making Explained
In this topic, I’m going to talk about the essential yet often overlooked technique of…